No Cinelerra, no video editing ;-)
This tutorial should show how to bring a "smaller" video on top of another.
Therefore simply press [n] (You do not want to risk to damage your work you've done so far, do you?)
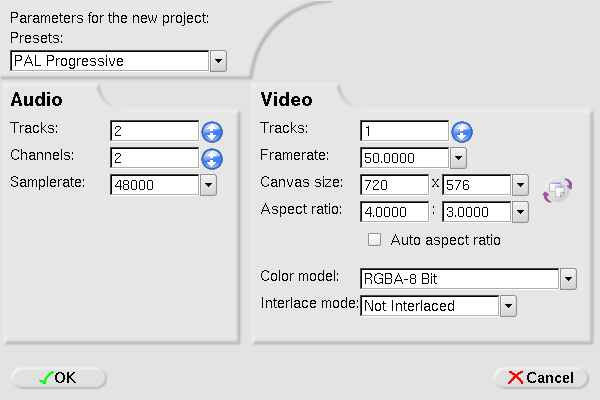
Choose in the up popping dialog your project's parameter. E.g. resolution of your project, framerate and so on. If you're not sure what the right values are, take one of the presets. I'm using PAL Progressive for all these tutorials. Confirm by clicking on OK.
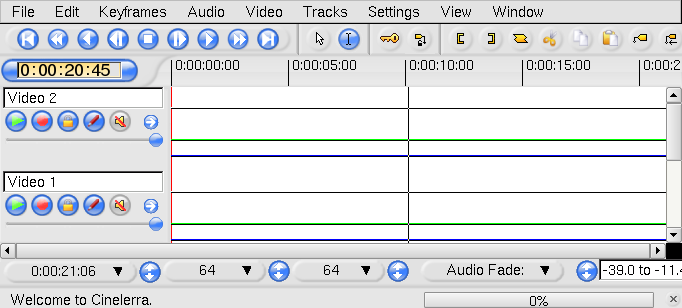
To get one video on top of another, we need two video tracks. To create a second one, (if you haven't already done) press [Shift]+[T]. Don't be afraid, your audio tracks aren't gone. Notice the scrollbar right of the timeline...
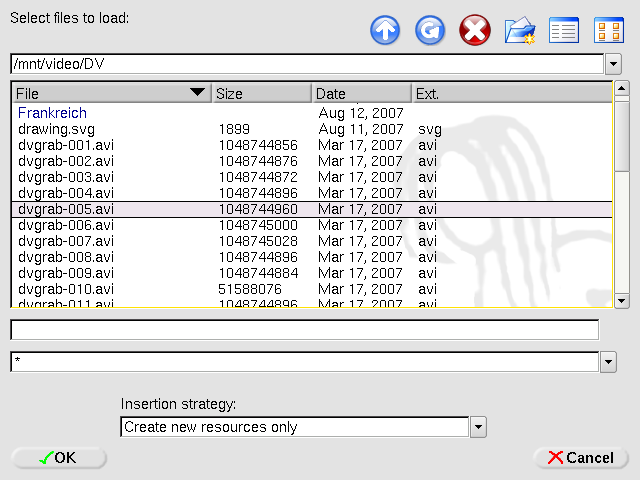
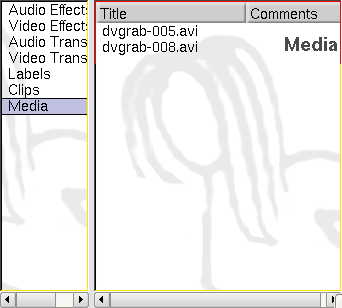
You will need two videos: one used as "background" and a second one as foreground. These can be either two complete (different) files or parts of one (or more) file(s). To load these files, press [o]. The load files dialog pops up. Select your video file(s), set the insertion strategy to "Create new resources only" and confirm by clicking on OK. All files you have loaded can be found in the resources window as "Media".
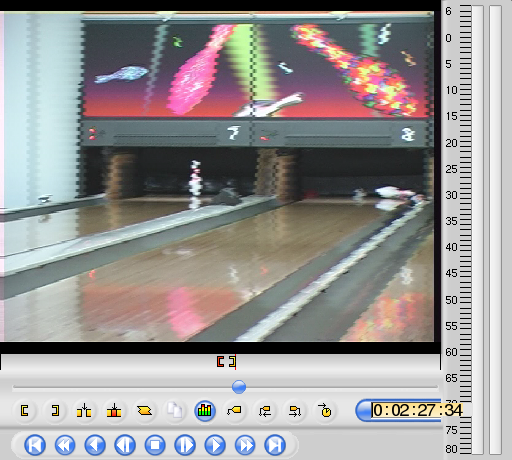
If it's neccessary, select now the exact parts of your fore- and your background. In this example both videos are parts of two big files. To "cut" the needed parts out of the whole material select one file and either drag it into the viewer or doubleclick on it. Now it can be seen in the viewer.
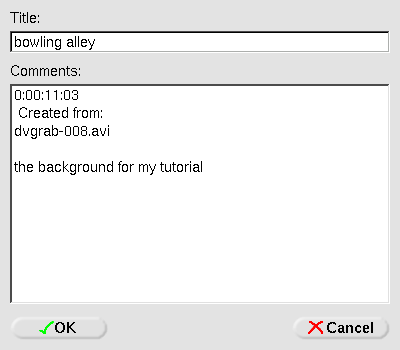
Search the part you want as background. Use therefor the [AltGr]+[[] (inpoint of your selection) and [AltGr]+[]] (outpoint of your selection) keys. If you wish to re-use this part of the video, make it a clip. Press [i]. The clip info window pops up. Give your selection the name it should have as clip. If you wish, you can add as well some comments. Repeat this with your foreground.
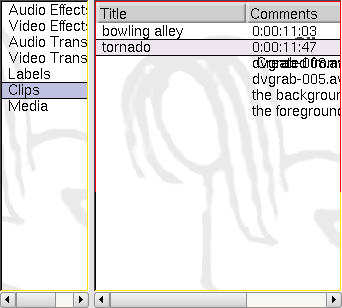
The new clips can be found as "Clips" (Where does this come from ?;-)) in the resources window.
At first arm the lower track. To do so move the mouse over it, and press [Shift]+[Tab]. It's now the only armed track, so the others won't be affected by your work. If you want, you can arm as well some audio tracks by pressing [Tab] while the mouse is over them (to get the audio for the background video onto the timeline as well). Bring via drag and drop the background clip in the lower track.
Now arm only the higher (foreground) track and fill it again via drag and drop. Ensure that it's now the only armed track.
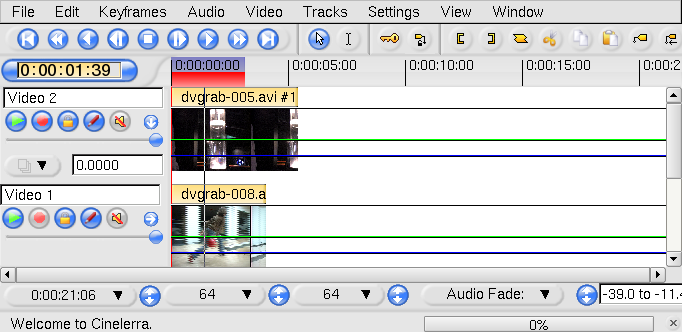
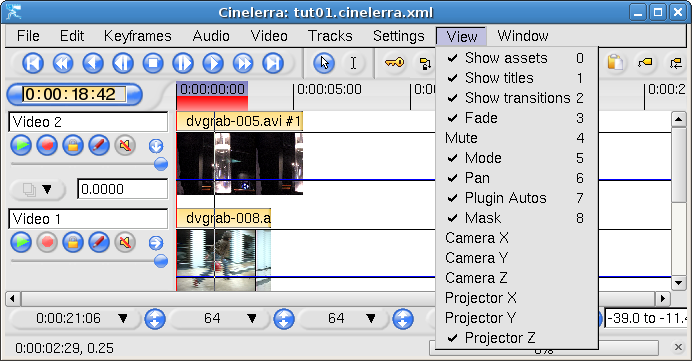
Ensure that in menu "View" "Projector Z" has got a tick. The blue lines on the tracks represent the Z values of the projectors.
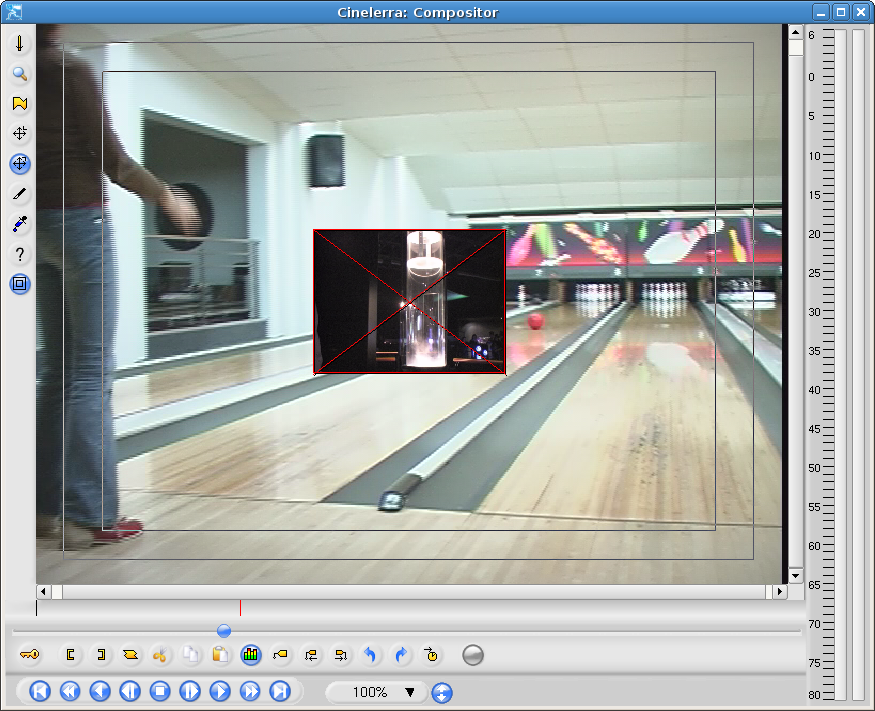
Therefore click and drag the blue line a bit down. If you look at the compositor, you will see the foreground as a smaller image on top of your background video.

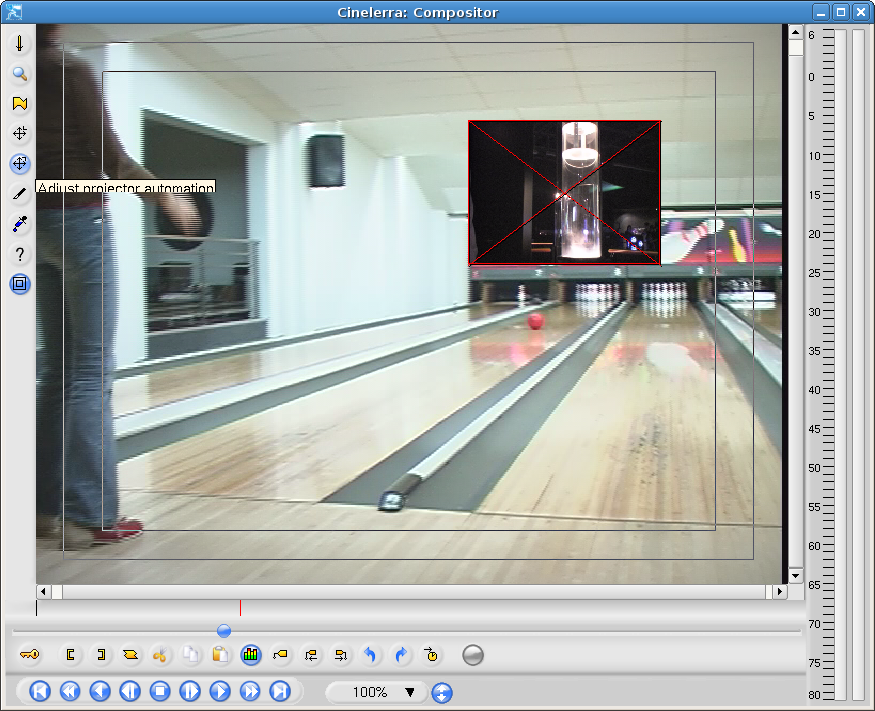
Toggle "Adjust projector automation" in the compositor. It has to be turned on. click on the red cross over your smaller video and drag it to it's destination.
you have nearly finished. For a smooth playback you should wait, until your video was rendered. (watch the red bar over the tracks). If your computer is fast enough, you can play it right now...
There are of course still thousands of possibilities left which are waiting for you to be discovered. How to make a PiP effect nonstatic is shown in the next tutorials.
Play around with Cinelerra!
Back to table of contents